Encryption is everywhere and for many websites very important. When building a website or application that will require encryption, it’s best to develop in a test environment with encryption available. This post is written for web developers, specifically OS X or Ubuntu users, and it describes exactly how to set up TLS (SSL) on a local development stack running Apache. Familiarity with using terminal and basic configuration of a website on the Apache web server is assumed.
How to Use SSL/TLS Locally

PART II OF TWO
Overview
A general procedure to use HTTPS locally:
- Generate a security key
- Use the key to generate a Certificate Signing Request [CSR]
- Use the CSR to generate a self-signed certificate
- Install the certificate on the web server
- Configure the browser to trust the self-signed certificate
Requirements
This article uses the OpenSSL Toolkit to generate the certificate. OS X comes with openssl installed. Install openssl on Ubuntu if you don’t already have it.
Generate a KEY and CSR
openssl req -new -newkey rsa:2048 -nodes -keyout domain_dev.key -out domain_dev.csrThe script will prompt for the following information. Most of this information will be publicly visible to anyone inspecting the certificate.
- Country Name
- State or Province Name
- Locality Name
- Organization Name
- Organizational Unit Name
- Common Name
- Email Address
- Challenge
The Common Name must match exactly the hostname intended for use. If the local site uses the domain name domain.dev, enter exactly that for the Common Name value. Leave blank the values for both Email Address and Challenge.
Alternatively, one could also generate the key and CSR separately, using the following commands:
openssl genrsa -out domain_dev.key 2048 openssl req -new -sha256 -key domain_dev.key -out domain_dev.csrThe values in the CSR can be verified afterwards, using the following:
openssl req -noout -text -in domain_dev.csrCreate a Self-Signed Certificate
In the same directory, use the key and CSR to create a temporary identity certificate, good for 365 days. The certificate produced is “self-signed, meaning the party responsible for validating identity is the very identity in question. As a result, there is an inherent trust issue, which will be handled later.
openssl x509 -req -days 365 -in domain_dev.csr -signkey domain_dev.key -out domain_dev.crtThe file domain_dev.crt is created as a result of this command. This file is the self-signed identity certificate.
When generating one’s own certificate, it is possible to produce the key, the CSR, and the certificate in a single command. This article describes the processes separately to reinforce the purpose of the different components in the certificate recipe. Also, when obtaining a certificate from a trusted Certificate Authority for use on a production website, one would only need to produce a key and a CSR; these instructions are valid for that purpose as well.
Install the Certificate
Certificate installation is nothing more than storing the certificate and key in a place the web server can access, and configuring the Apache Virtual Host to use them. However, setting up support for SSL (TLS) differs depending on the server OS and version of Apache. An Apache module named mod_ssl must be installed and enabled.
Ubuntu 14.04
Currently, Ubuntu 14.04 is the most recent distribution with Long Term Support. It ships with an Apache package which includes mod_ssl. To enable mod_ssl, run the following command:
sudo a2enmod sslRHEL / CentOS
If you prefer Red Hat or CentOS, the setup process is similar. Install the module and the OpenSSL Toolkit like so:
yum install mod_ssl opensslApache must be restarted for the changes to take effect.
Configure an Apache Virtual Host
When a port number is not specified with a request, as is often the case, browsers automatically try the default port associated with the specified protocol. The Internet Assigned Numbers Authority is the official registry of standard port numbers. All browsers can be relied upon to use the default port. By default, HTTP protocol uses port 80. HTTPS uses port 443 by default.
To start using HTTPS for development and testing, simply enable the SSL Engine and include the key and the certificate in a Virtual Host listening on port 443:
<VirtualHost *:443>
  ServerName domain.dev
  DocumentRoot /server/path/domain.dev/web/

  <IfModule mod_ssl.c>
    SSLEngine on
    SSLCertificateFile /server/path/secret/domain_dev.crt
    SSLCertificateKeyFile /server/path/secret/domain_dev.key
    SetEnvIf User-Agent ".*MSIE.*" nokeepalive ssl-unclean-shutdown
    CustomLog /server/path/logs/ssl_request_log \
      "%t %h %{SSL_PROTOCOL}x %{SSL_CIPHER}x \"%r\" %b"
  </IfModule>

</VirtualHost>
Don’t forget to restart Apache, likely:
Ubuntu
sudo service apache2 restartRed Hat
sudo systemctl restart httpdOf course, there is much more to explore; this article provides the minimum needed to start rocking HTTPS. Here is Apache’s official documentation for using HTTPS, getting the SSL module loaded, and configuring listening on port 443. Read about using TLS instead of SSL in Part I, or dive into the module details.
Trust Management for Self-Signed Certificates in OS X
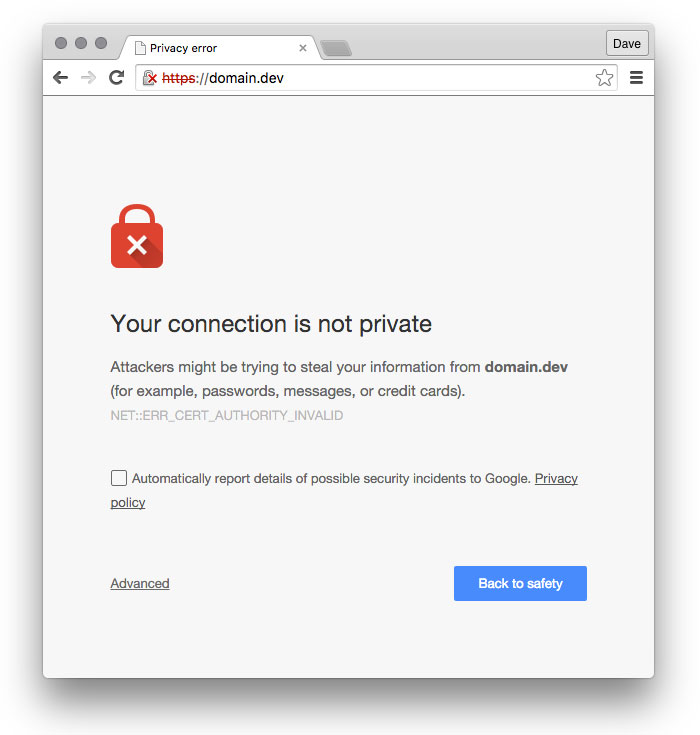
Done? Nope. Because the certificate is not signed by a trusted authority, the browser will still complain that the certificate is not valid.
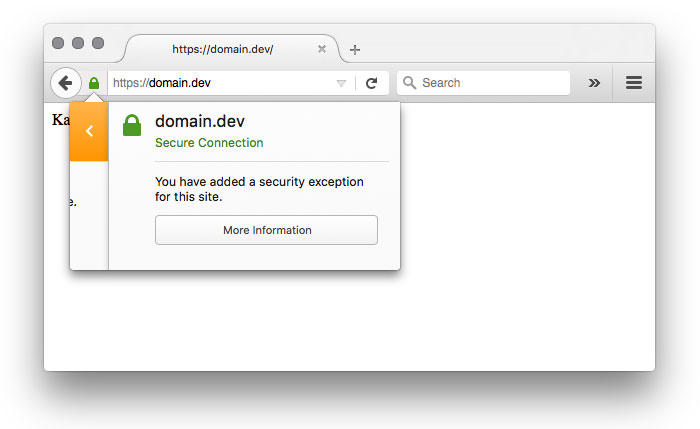
In Firefox, it may not be possible to add a permanent exception without an add-on. Permitting the exception every time Firefox is restarted may be necessary, but it will work.
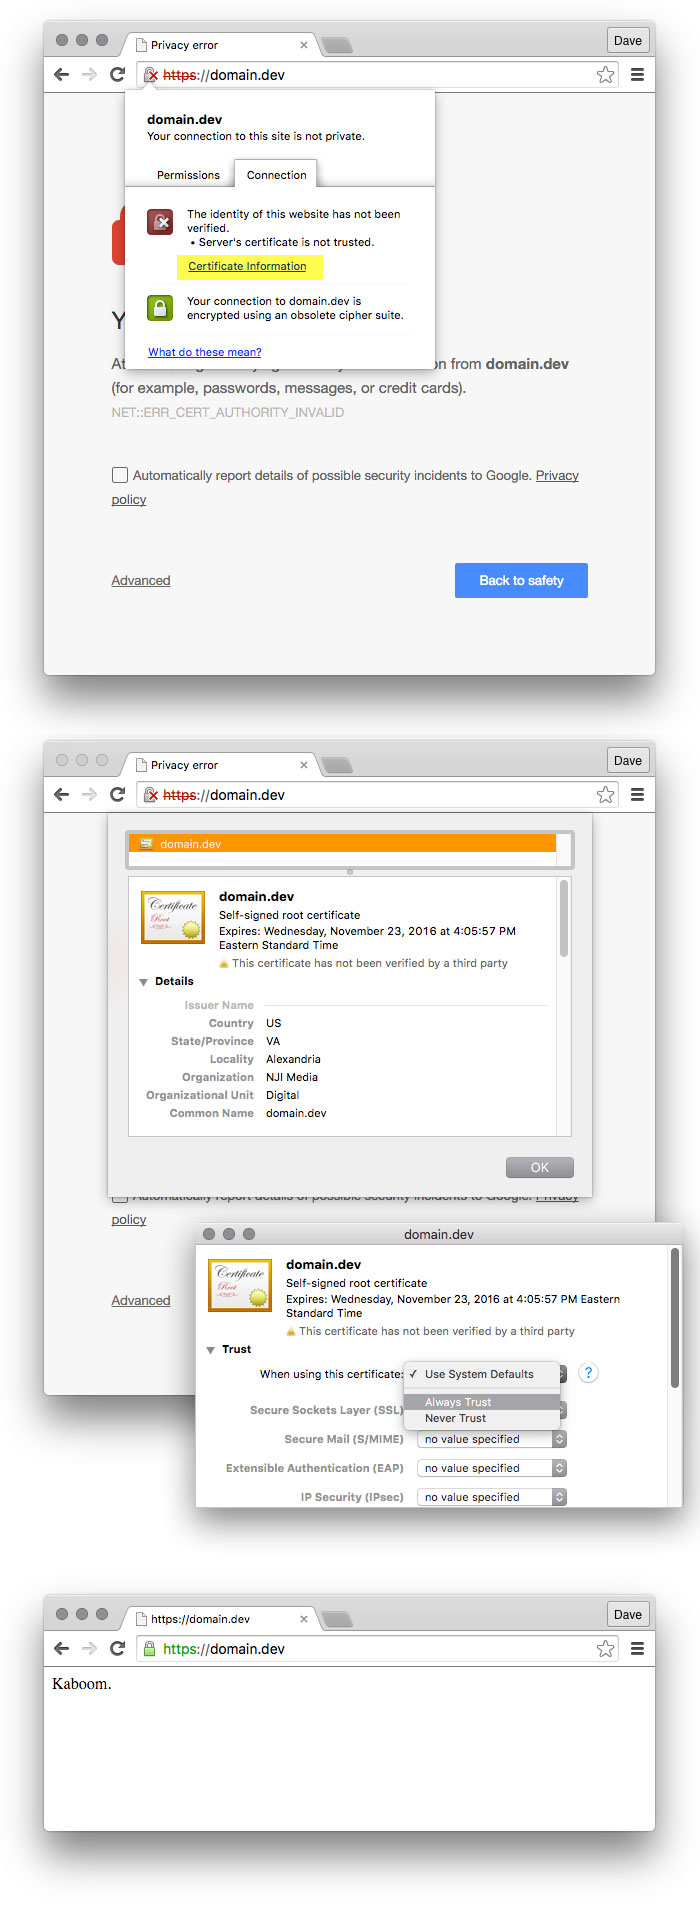
Using Chrome, it is possible to permanently configure trust for the self-signed certificate. That post by Rob Peck is a great reference and still works nicely. To summarize, use Chrome to inspect the invalid certificate, drag it to your desktop, then open it with the Keychain Access app to configure a permanent trust exception.
Configuring SSL In MAMP
If you’re using MAMP, heaven help you. And by heaven, I mean the people of Stack Overflow. If this drives you bananas, give Vagrant a gander.